🎙️ Opening Monologue
The rain taps against the window as I stare at an environment Terraform never created.
Resources born of urgency. Changes made by clicks. Fixes layered on top of fixes, until no one remembers what the original plan was. It works technically, but it isn’t managed. And late nights have a way of making that distinction impossible to ignore.
This isn’t about blame or cleanup. It’s about alignment. About understanding what Terraform thinks exists, what actually exists, and what happens when those two drift apart.
Tonight isn’t about tearing anything down. It’s about reconciling belief with reality before the gap between them becomes dangerous.
If infrastructure has a truth, we need to know where it lives.
🎯Episode Objective
This episode aligns with the Terraform Associate (004) exam objectives listed below.
- Describe the local backend
- Describe state locking
- Configure remote state using the backend block
- Manage resource drift and Terraform state
- Use the CLI to inspect state
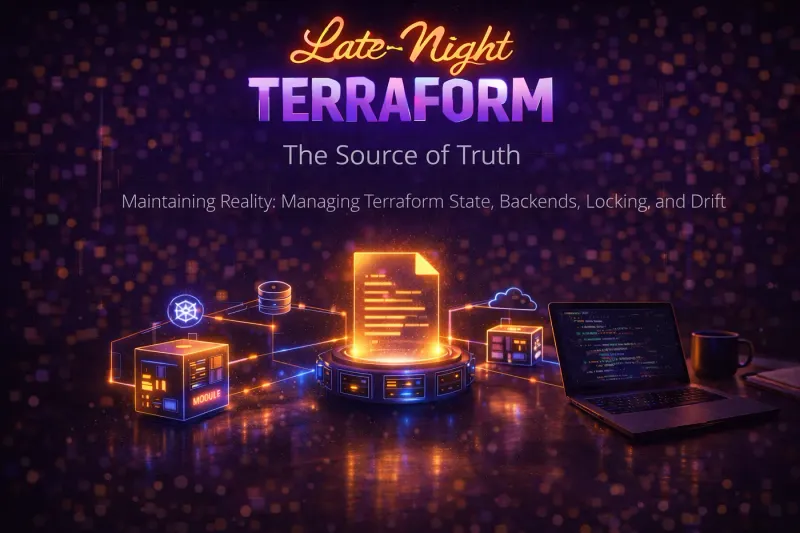
The Digital Mirror: Why State Is the Heart of the Machine
If Terraform is the architect drawing the blueprints, then Terraform State is the site manager’s clipboard. It tracks every brick laid, every wire pulled, and every change made to the building. Without that clipboard, the architect would have no idea what has already been built and what still needs to be done. At its core, Terraform State is a mapping file.It bridges:
- Your .tf configuration files (what you want)
- The real resources running in the cloud (what you have)
When you run terraform apply, Terraform doesn’t just look at your cloud provider; it looks at its state file to see what it did last time. It’s the “source of truth” that ensures Terraform doesn’t accidentally recreate a database that already exists.
Why do we need it? (The Purpose)
Terraform State solves three massive headaches for DevOps engineers:
- Resource Mapping: Cloud providers use complex IDs (like
i-04f123abc). The state maps these IDs to the human-readable names you use in your code (likeweb_server_primary). - Dependency Management: It tracks the “Family Tree” of your infrastructure. It knows that the Network must exist before the Virtual Machine can be plugged into it.
- Performance Boost: Querying a cloud provider for thousands of resources is slow. The state file provides a local cache of your infrastructure, making commands like
terraform planmuch faster.
Storage and Format: Where does it live?
The Format: JSON
The state is stored in a structured JSON format. While it is human-readable, you should never manually edit this file. One misplaced comma can “corrupt” your infrastructure, making Terraform lose track of your resources.
The Storage: Local vs. Remote
Where you keep this file determines how well your team collaborates:
- Local Stored as terraform.tfstate in the working directory. Best suited for solo experiments or learning. It’s quick to set up, but difficult to share, prone to accidental overwrites, and carries a high risk of state loss or corruption.
- Remote: Essential for team environments and production workloads. Remote backends provide state locking (preventing concurrent changes), encryption at rest, versioning, and act as a single source of truth for everyone working on the infrastructure.
The Sacred Text: Why State Is Treated as Read-Only
You should never edit the state file directly. While it’s tempting to open terraform.tfstate and change a value, it’s a recipe for disaster. Instead, Terraform provides Unix-friendly CLI commands that act as a safety layer. Even if the internal state format changes, these commands remain stable.
Terraform provides the terraform state command to perform controlled, low-level operations on the state file using the CLI. These commands are intentionally designed for advanced use cases, such as refactoring resources or recovering from mistakes.
Why use the CLI instead of manual edits?
- Safety: The CLI acts as a protective layer. Even if the underlying state format changes in a new version of Terraform, the commands you use will stay the same.
- Integrity: Commands like terraform state rm (to make Terraform “forget” a resource) ensure that you aren’t leaving behind “ghost” dependencies that could break your next deployment.
Maintaining the one-to-one resource mapping
Terraform enforces a strict one-to-one relationship between:
- A resource instance in the state, and
- A real-world infrastructure object
If you modify this mapping manually — such as:
- Importing existing infrastructure using
terraform import, or - Removing a resource from state using
terraform state rm
— you are responsible for restoring consistency.
For example, if Terraform is told to “forget” a resource, you must either manually delete the real resource or re-import it into another resource block to avoid unmanaged infrastructure.
Automation & External Tools
Terraform state snapshots are generally backward compatible across versions. You can safely upgrade Terraform and continue using existing state files in most cases.
However, the state file format itself is not a stable API. Any custom tooling that directly parses or modifies the raw state file should expect ongoing maintenance as Terraform versions evolve.
If you are building custom tools or scripts to analyze your infrastructure, Terraform offers two “official” ways to get data out safely without parsing the raw state file:
terraform output -json: Perfect for grabbing specific values (like an IP address or DB endpoint) to pass into another script.terraform show -json: This provides a full, stable representation of your state. It’s the “gold standard” for external software to read exactly what Terraform knows about your world.
The Shared Memory: Collaboration and Security with Remote Backends
By default, Terraform stores state on your local hard drive. This is fine for a weekend project, but in a professional setting, you need a Backend.
1. The Security Advantage (No Disk Footprint)
When you use a remote backend (like S3, Azure Blob, or Consul), Terraform keeps the state in memory while it works.
- The Benefit: Sensitive data (like API keys or DB passwords) never touches your local disk.
- The Safety Net: If the remote backend fails during a write, Terraform will save a local emergency copy to prevent data loss. You’ll then need to manually “push” this back once the connection is restored.
2. State Locking: Preventing the “Collision”
Imagine two engineers running terraform apply at the exact same time. Without protection, they would overwrite each other’s changes, leading to a corrupted mess.
State Locking is the solution.
- How it works: Terraform automatically “locks” the state file when a write operation begins.
- What happens if it’s locked: If you try to run a command while a teammate is already working, Terraform simply stops and waits (or exits with an error).
- The Emergency Brake: If a process crashes and the lock gets “stuck,” you can use the
force-unlockcommand.
Warning for your readers: Only use
_force-unlock_if you are 100% sure no one else is actually running a process. To prevent accidents, Terraform requires a unique Lock ID (a nonce) to ensure you aren’t unlocking the wrong session.
Parallel Realities: Isolating Environments with Terraform Workspaces
If you’ve ever wondered how to use the same code to deploy a “Dev” environment and a “Production” environment without copy-pasting your files, Workspaces are the answer.
What are Workspaces?
Terraform CLI workspaces represent multiple, isolated state files within the same Terraform configuration and working directory. Each workspace maintains its own state, allowing the same configuration to manage multiple independent sets of infrastructure.
⚠️ Terraform CLI workspaces are not the same as HCP Terraform workspaces.
- CLI workspaces → same configuration, multiple states
- HCP Terraform workspaces → separate configurations, separate working directories
Using Workspaces
Terraform always starts with a non-deletable default workspace.
- If no workspace is created, you are using
default - Resources in other workspaces still exist physically
- Terraform only manages the resources of the currently selected workspace
Running terraform plan or apply affects only the active workspace’s state.
Why Use Them?
The biggest advantage is Testing and Feature Branches. Imagine you want to test a new network change. Instead of risking the main infrastructure, you create a new workspace (e.g., feature-xyz), deploy a temporary copy of everything, test it, and then destroy it when you’re done.
Key Difference: CLI Workspaces are local to your directory. If you move to HCP Terraform, workspaces there are even more powerful, acting as entirely separate working directories with their own unique configurations.
Dynamic Configurations with Interpolation
One of the coolest “pro-tricks” is using the current workspace name directly in your code. Using the ${terraform.workspace} variable, your infrastructure can “self-adjust.”
Example: Smaller servers for Dev, bigger for Prod
resource "azurerm_resource_group" "main" {
  # Result: "rg-app-dev", "rg-app-prod", etc.
  name     = "rg-app-${terraform.workspace}"
  location = "East US"
}
Essential Workspace Commands
Managing these environments is straightforward with the CLI:
terraform workspace list: See all your environments.terraform workspace new <name>: Create a new environment.terraform workspace select <name>: Switch between environments.terraform workspace select -or-create <name>: Select or createterraform workspace show: Remind yourself which “room” you’re currently standing in.
The Break-Glass Protocol: When and How to Intervene in State
Sometimes, despite all the guardrails, things go wrong. Maybe a network partition left your state in an inconsistent place, or you need to perform a surgical fix that the standard CLI commands can’t handle. For these moments, Terraform provides pull and push.
1. terraform state pull: The Safe Backup
This command fetches the current state from your remote backend and streams it to your terminal (stdout). It’s the safest way to get a local copy of your “source of truth” for inspection or backup.
Pro-Tip: Always run terraform state pull > backup.tfstate before attempting any complex manual state modifications. It’s your undo button.
2. terraform state push: The Nuclear Option
This is the most dangerous command in the Terraform arsenal. It allows you to manually upload a local state file and overwrite the remote state entirely.
Because of the risks, Terraform builds in two “biological locks” to protect you:
- Lineage Check: Every state has a unique ID (Lineage). If you try to push a state file that doesn’t match the remote lineage, Terraform will block you, assuming you’re trying to overwrite the wrong project.
- Serial Number Check: Every change increments a “Serial” number. If the remote state has a higher serial than your local file, Terraform knows you’re about to “time travel” backward and delete recent changes, so it will stop the push.
When to use
_-force_:** You can bypass these checks with the_-force_flag, but this should only be done as a last resort (e.g., recovering from a corrupted backend). As the saying goes: With great power comes great responsibility.
Surgical Removal: Safely Removing Resources from State
In the past, if you wanted Terraform to “forget” a resource without actually deleting it from your cloud provider, you had to run a manual CLI command: terraform state rm.
While effective, it was a “dark” operation — it didn’t show up in your code reviews or plan files. Now, there is a better way: The removed block.
Why use a removed block?
- Visibility: It’s part of your code. Your teammates can see exactly what is being removed during a PR (Pull Request).
- Safety: You get to see the impact during a
terraform planbefore anything happens. - Declarative: It follows the core philosophy of Terraform — describe the state you want in text files.
How to use it
If you have a resource (e.g., a test server) that you want to keep running but stop managing with Terraform, follow these steps:
- Delete the resource block from your
.tffile. - Add a
removedblock in its place: Settingdestroy = truewould remove the resource from state and destroy it.
removed {
  from = aws_instance.example  # The address of the resource

  lifecycle {
    destroy = false            # Crucial! Keeps the resource alive in the cloud
  }
}- Run
terraform apply.** Terraform will confirm it is removing the object from its state without sending a “delete” signal to the cloud provider. Once theapplyis finished and the resource is gone from your state, you can safely delete theremovedblock from your code entirely.
The Old Way: terraform state rm
While the removed block is recommended, the CLI command still exists. It’s useful for quick, one-off fixes, but remember: it bypasses the “plan and approve” workflow. If you use it, you are performing “manual surgery” on your infrastructure.
Refactoring State: Moving from Monolith to Micro-State
As your infrastructure grows, your terraform.tfstate file will grow with it. Eventually, you’ll hit a wall where a single terraform plan takes 10 minutes to run. This is a sign that it’s time to Refactor.
When is it time to Refactor?
Don’t wait for your state to break. Look for these “code smells”:
- The “Ten-Minute Wait”: If your team is sitting around waiting for plans to finish, your state is too large.
- The “Blast Radius” Fear: You find yourself terrified to update a simple Tag because the state file also controls your Production Database.
- Organizational Shifts: The Networking team and the App team are constantly stepping on each other’s toes in the same repository.
- Different lifecycle patterns: Frequently changing resources (compute, scaling rules) should be managed separately from long-lived resources (networks, databases).
- Module extraction opportunities: A repeatable subset of infrastructure is a strong candidate for a reusable Terraform module.
The Art of the Split: Dependencies and Migration
When you divide one giant state file into two, you aren’t just moving code; you are breaking connections. To do this successfully, you need to handle Dependencies and choose a Migration Strategy.
1. Connecting the Dots: Handling Dependencies
If your “App” state needs to know the ID of a Vnet that now lives in the “Network” state, do not hard-code the ID. Hard-coding creates a maintenance nightmare. Instead, use these dynamic methods:
- Cloud Data Sources: Use
datablocks to query the cloud provider directly (e.g.,data "azurerm_virtual_network" "selected"). This is the most decoupled way. terraform_remote_state:** This data source allows one Terraform configuration to read the root outputs of another state file. It’s perfect for linking related but separate layers.tfe_outputs:** If you are using HCP Terraform, this is the native, secure way to share data between workspaces.
2. Choosing Your Migration Path
There are two ways to move a resource (like a production database) from “State A” to “State B” without accidentally deleting it.
Option A: The Modern Way (Removed & Import Blocks)
This is the recommended approach because it leaves an “audit trail” in your code. It’s a two-step dance:
- Create a backup: Back up the current state:
terraform state pull > backup.tfstate - In the Source: Replace the
resourcewith aremovedblock (destroy = false). Apply this to make Terraform “let go” of the resource. - In the Destination: Add the
resourceblock plus animportblock. Apply this to make the new state “take ownership.”
Why it’s better: You get a
_terraform plan_for both steps, ensuring no resources are destroyed by mistake.
Option B: The Legacy Way (terraform state mv)
If you prefer the command line, you can move resources directly between local state files.
pullboth states to your local machine. Example:terraform state pull > source.tfstateandterraform state pull > destination.tfstate- Use
terraform state mvto “cut and paste” the resource from one file to the other. Example:terraform state mv -state source.tfstate -state-out destination.tfstate aws_instance.example aws_instance.example pushboth files back to their respective remote backends. Example:terraform state push source.tfstateandterraform state push destination.tfstate
The Watchtower: Inspecting and Auditing Terraform State
Even if you never touch the JSON file, you will frequently need to audit your infrastructure. Terraform provides five essential commands to help you visualize and verify your state.
1. The Audit List: terraform state list
Think of this as your “Inventory.” It provides a clean, simple list of every resource address Terraform is currently managing.
- Pro-tip: Use this to quickly find a resource address when you need to run a
state rmorremovedblock.
2. The Deep Dive: terraform state show
If list is the inventory, show is the spec sheet. If you want to know the exact IP address, ARN, or private attribute of a single resource, this command pulls that data directly from the state for you.
3. The Big Picture: terraform show
While state show targets one resource, terraform show gives you the entire landscape.
- Human-Readable: Great for a quick overview of the current environment.
- JSON Mode (
-json): This is the industry standard for automation. If you are writing a script to audit your security groups or check for unencrypted buckets, pipe the JSON output of this command into a tool likejq.
4. The Sync: terraform refresh
Cloud resources can sometimes be changed manually in the console (known as “drift”).
- The Function: This command queries the real-world resources and updates the state file to match reality.
- Note: You rarely need to run this manually because Terraform performs a refresh automatically every time you run a
planorapply.
5. The Visualizer: terraform graph
Infrastructure is complex. terraform graph generates a visual representation of your resources and their dependencies using the DOT language.
- Use Case: This is excellent for documenting your architecture or troubleshooting why a specific resource is taking so long to create — it usually reveals a long chain of dependencies you didn’t realize existed.
🌙 Late-Night Reflection
The hardest part of infrastructure isn’t the cloud — it’s the memory. When the code and the reality drift apart, the tool becomes a source of chaos rather than a source of truth. Maintaining that alignment requires a level of discipline that goes beyond just writing files; it requires a constant awareness of the state of your world.
✅ Key Takeaways
- Terraform State = Source of Truth: Terraform decides what to create, update, or destroy based on state, not by re-scanning the cloud.
- Remote Backends Matter: Storing state in S3, GCS, Azure Blob, etc., enables team collaboration, versioning, and safer recovery.
- State Locking Prevents Collisions: Supported backends ensure only one
applycan modify state at a time. - Never Edit
.tfstateManually: Always use Terraform CLI commands for state changes. - Declarative State Changes Are Safer: Prefer
moved,removed, andimportblocks over ad-hoc CLI surgery. - Smaller State = Faster Terraform: Refactoring large states reduces plan time and blast radius.
📚 Further Reading
- Terraform state documentation
- Use refresh-only mode to sync Terraform state
- Refactor Terraform state documentation
[moved](https://developer.hashicorp.com/terraform/language/v1.12.x/block/moved)block reference documentation- Remove a resource from state documentation
[backend](https://developer.hashicorp.com/terraform/language/v1.12.x/backend)block configuration documentation- State storage and locking documentation
🎬 What’s Next
Understanding reality is one thing. Owning the past is another.
We’ll learn how to bring existing infrastructure under Terraform’s control — without tearing it down.